5 Easy Steps to Clean Headlights
Tips on headlight restoration and steps to combat foggy headlights, yellow headlights, and more


As drivers and vehicle owners, we're used to regular maintenance and dealing with the gradual wearing down of components. As we add miles to our cars, it's understood that some of these components will need to be repaired or replaced, such as tires, wipers, and batteries. But rarely do we think about our vehicle's headlights, unless one of them goes out and makes it hazardous to drive at night or in the rain.
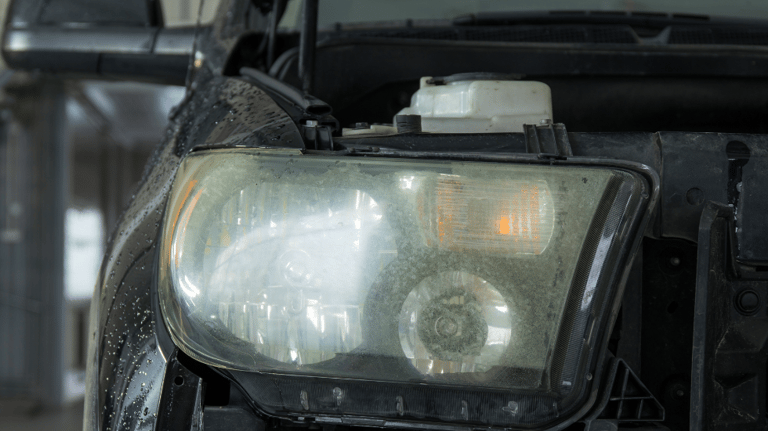
The reality is, as vehicles age—particularly when they're parked outside in the sun or in climates with extreme temperatures—owners often notice that their headlights take on a dimmer, yellowed, and foggy appearance. Aged headlights with this sort of wear, even if the bulbs inside them still work, aren't as bright and don't provide as much focused light on the road, compared to newer headlights. Yellowed, foggy headlights lower our visibility behind the wheel and make our vehicles less safe to operate.
In this article, we'll take a look at what causes yellow headlights, plus how to clean headlights and restore brightness. Keep reading to find out how you can keep your headlights bright, your visibility at a maximum, and your vehicle operating safely in all weather conditions, at all times of day or night.
What causes headlights to yellow and become foggy?
While the types of headlights and their shape vary greatly, there are four main parts of each vehicle headlight: the housing, the regular-beam bulbs, the high-beam bulbs, and the turn signals. Although the construction, external shape, and types of bulbs will differ from vehicle to vehicle, the housing (the lenses you see when looking at a vehicle from the front) are made from hard, clear, polycarbonate. This polycarbonate is a thermoplastic polymer designed with high heat resistance—both for outdoor elements and the superheated bulbs that glow inside them.
When headlights are first installed on a vehicle, they come equipped with a clear coat designed to protect the polycarbonate plastic from oxidizing in UV light. Over time, this clear coat wears off. When it does, the intense UV rays of the sun and the passage of time can cause microscopic cracks in the polycarbonate. These cracks capture dirt, dust, and grime from the road and lead to the gradual yellowing and fogginess seen in the headlights of older vehicles.
.png?h=432&w=768)
How to clean headlights & restore brightness
The good news about yellowed or foggy headlights is that you shouldn't have to replace the entire housing to bring back their effectiveness and showroom shine. They're easily fixed with a few items from the hardware or auto supply store and a bit of elbow grease. To restore and clean your yellowed headlights, gather these supplies:
- Painters tape or masking tape
- Bucket of warm, soapy water
- Latex gloves
- 1000-2500 grit sandpaper (wet and dry)
- Clean, soft cloth and wash rags
- Plastic polishing compound
Step 1: Wash Your Headlights
Using the warm, soapy water, clean the surface dirt and debris from the headlights, then rinse with clean water and allow them to fully dry.
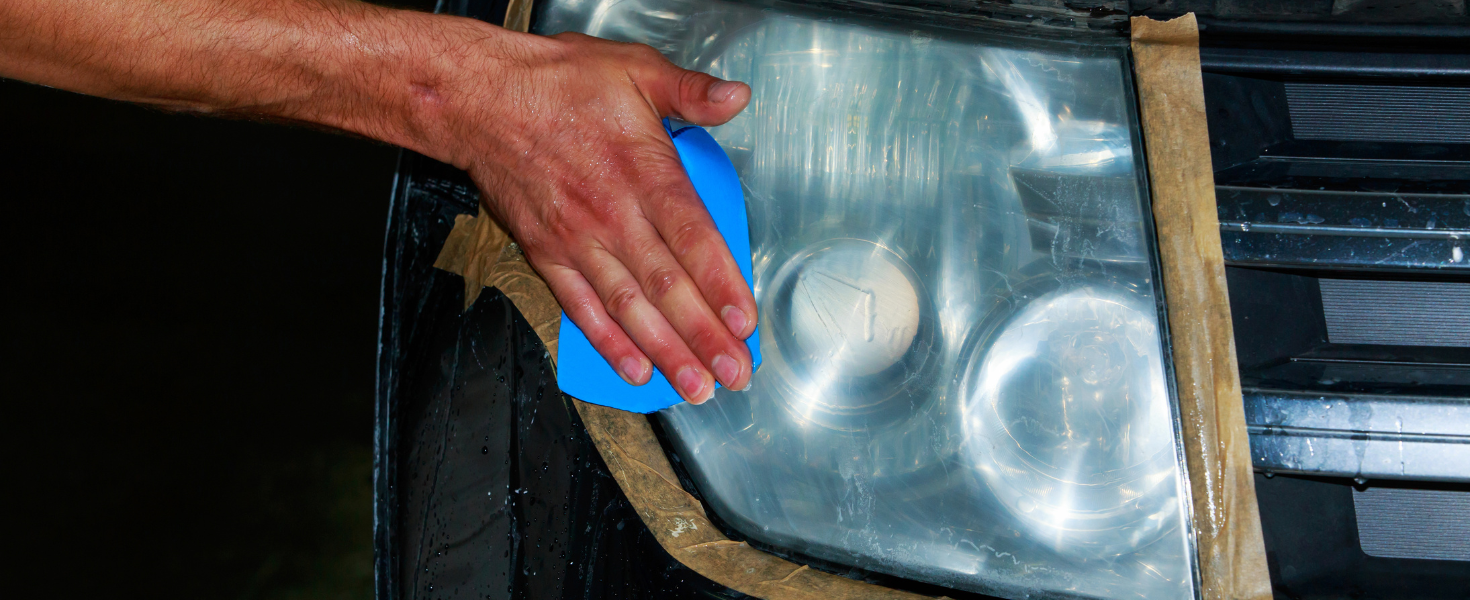
Step 2: Tape off Your Headlights
You'll want to protect the clear coat and paint that surrounds your vehicle's headlights from stray sandpaper swipes. Use your painters tape or masking tape to cover any painted bodywork that surrounds the edges of the lenses.
Step 3: Soak & Sand
Soak your sandpaper in water briefly to wet it, then start sanding in one direction (up and down or side to side). For lenses with light scratches, start with the rougher, 1000 grit sandpaper and work up to 2500 grit. If the headlight is just slightly dull or yellow, start with the finer, 2500 grit sandpaper.
Step 4: Rinse & Sand Again
Once you're satisfied with the sanding in one direction, rinse the lenses. Then, use the finer grit sandpaper and begin sanding again, switching directions from your first round of sanding.
Step 5: Rinse & Apply Polish
After sanding is complete, wash the headlights with cool water and let them dry. Wet a corner of your clean, soft cloth with plastic polishing compound. Using firm pressure, polish the newly sanded headlights with small, circular patterns until they become smooth and clear. You may need to repeat this process several times. If so, allow the polish to dry in between polishes and then focus on trouble areas that may remain foggy.